Developers
Managing Users
In this guide, we’ll show you the different user roles in Incident Insight and how to add, delete, and manage users.
User Roles
There are four user roles to ensure tailored access and functionality based on individual responsibilities. Each role has specific permissions, dictating what users can view, edit, and manage.
Viewers
– Viewers are read-only users who can view projects, subfolders, and diagrams but not edit them.
– Any changes applied locally are not saved.
– Viewers do not have access to the Dashboard.
– Viewers can access non-restricted projects and restricted projects they are assigned to.
– Action Register Feature: Viewers can see assigned actions to them and mark them as complete/incomplete.
Metadata Editors
– Metadata Editors have the same permissions as Viewers but can edit existing metadata on a node.
– Metadata Editors can access all non-restricted projects and restricted projects they are assigned to.
– Action Register Feature: Metadata Editors can see assigned actions to them and mark them as complete/incomplete.
Diagram Editors
– Diagram Editors can create, edit, and delete projects, subfolders, and diagrams.
– They can create templates, but not change or delete them once created.
– Diagram Editors can access all non-restricted projects and restricted projects they are assigned to. They can also assign user groups access to their projects.
– Diagram Editors have full access to the Dashboard but cannot see restricted project data. Essentially, they can do everything except change company settings/software settings and manage users.
– Action Register Feature: Diagram Editors can add and edit actions, see assigned actions to them, mark them as complete/incomplete, make completion notes, add assignees, and close/reopen an action. A Diagram Editor can only edit the contents of another user’s action if they have been given this permission in the user settings. Aim to keep the number of diagram editors with this permission to a minimum, as they have full editor rights within the action register.
Organisation Admins
– Organisation Admins have full access to everything on the application and can see and edit all projects.
– They can change company settings/software settings and manage users.
– Action Register Feature: Organisation Administrators can add and edit actions, see assigned actions to them, mark them as complete/incomplete, make completion notes, add assignees, close/reopen an action and assign editor rights to diagram editors in user settings
Add/delete users to Safe Task
NOTE: Only Organisation Admins can access the Users Menu, and are therefore the only users who can complete this action.
Step 1: Head to the User Menu. Click the + User button.
Step 2: Complete the required fields and choose the user’s role (Viewer, Metadata Editor, Diagram Editor, or Organisation Admin) from the drop-down menu and click Save. 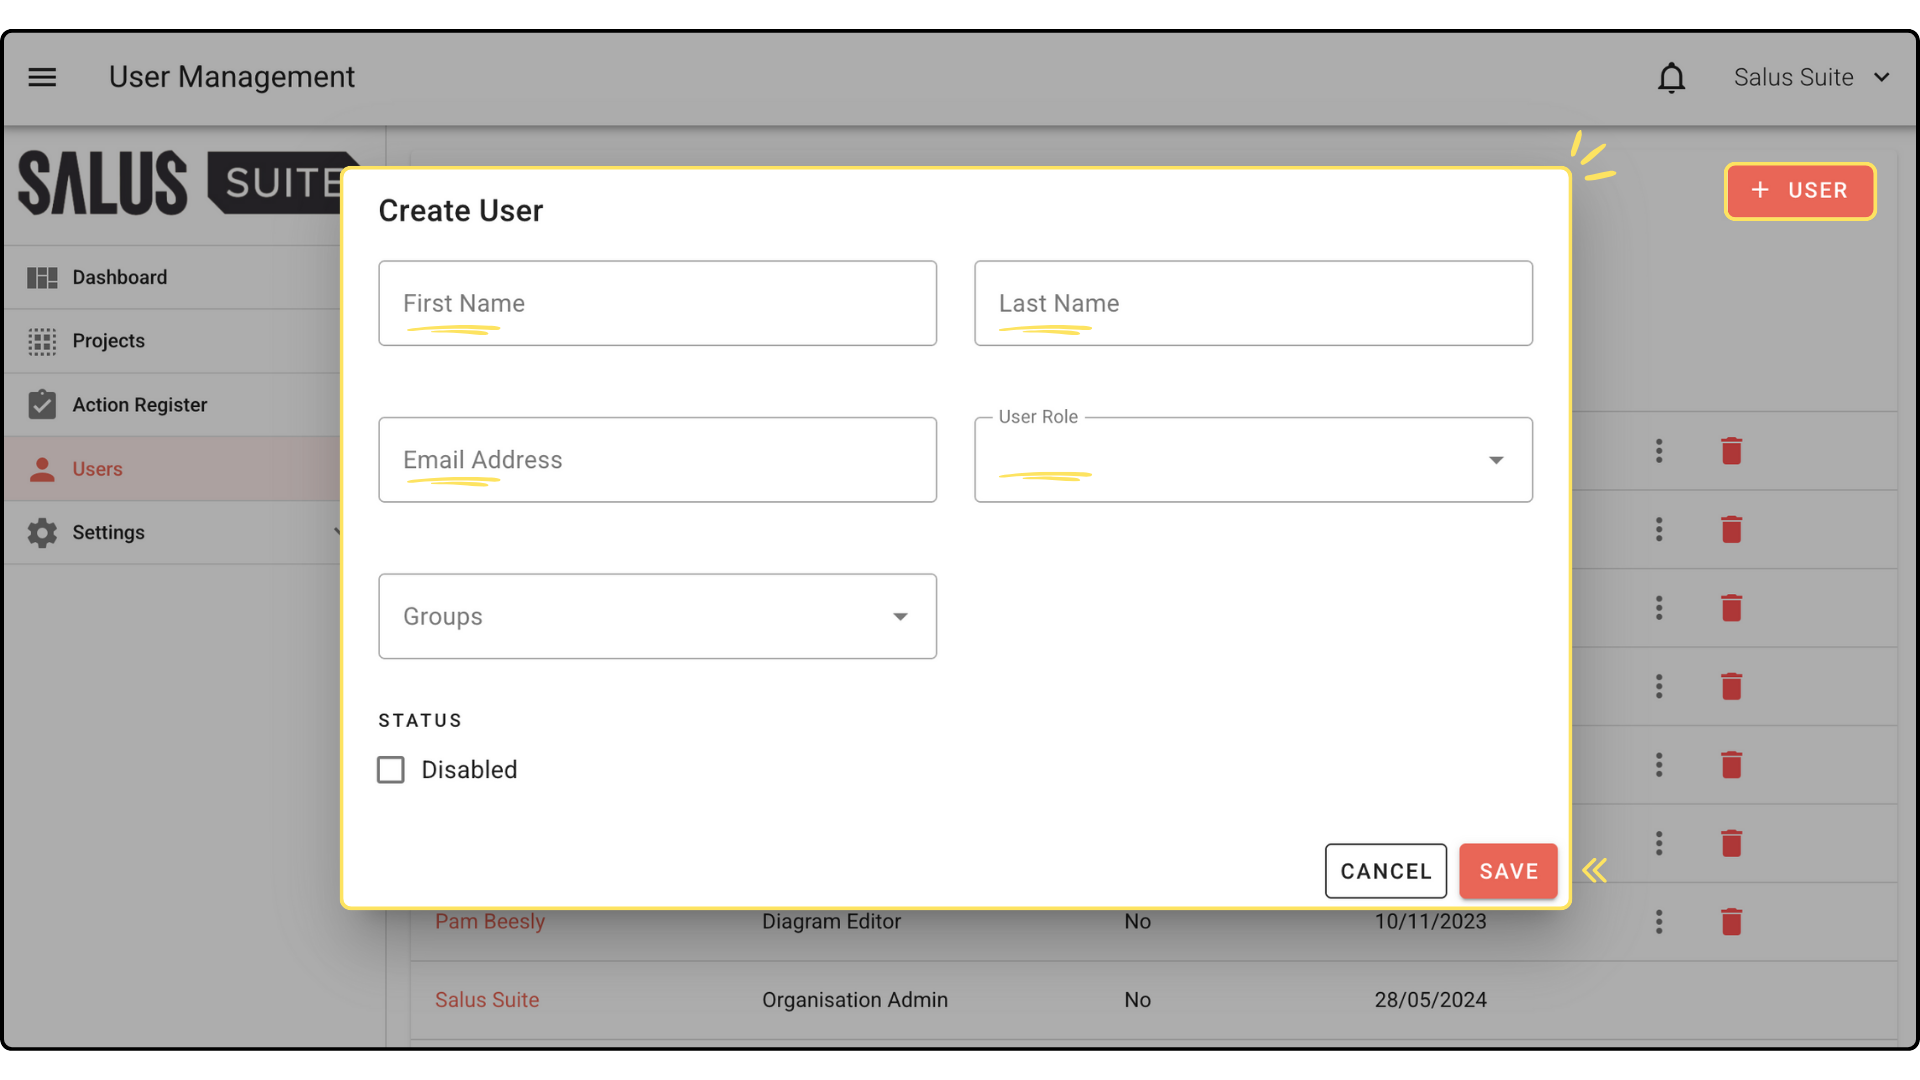
Step 3: To delete a user, click on the Bin Icon beside the User in the User Menu. 
Step 4: In the warning message, click Delete User. This will permanently delete the user. 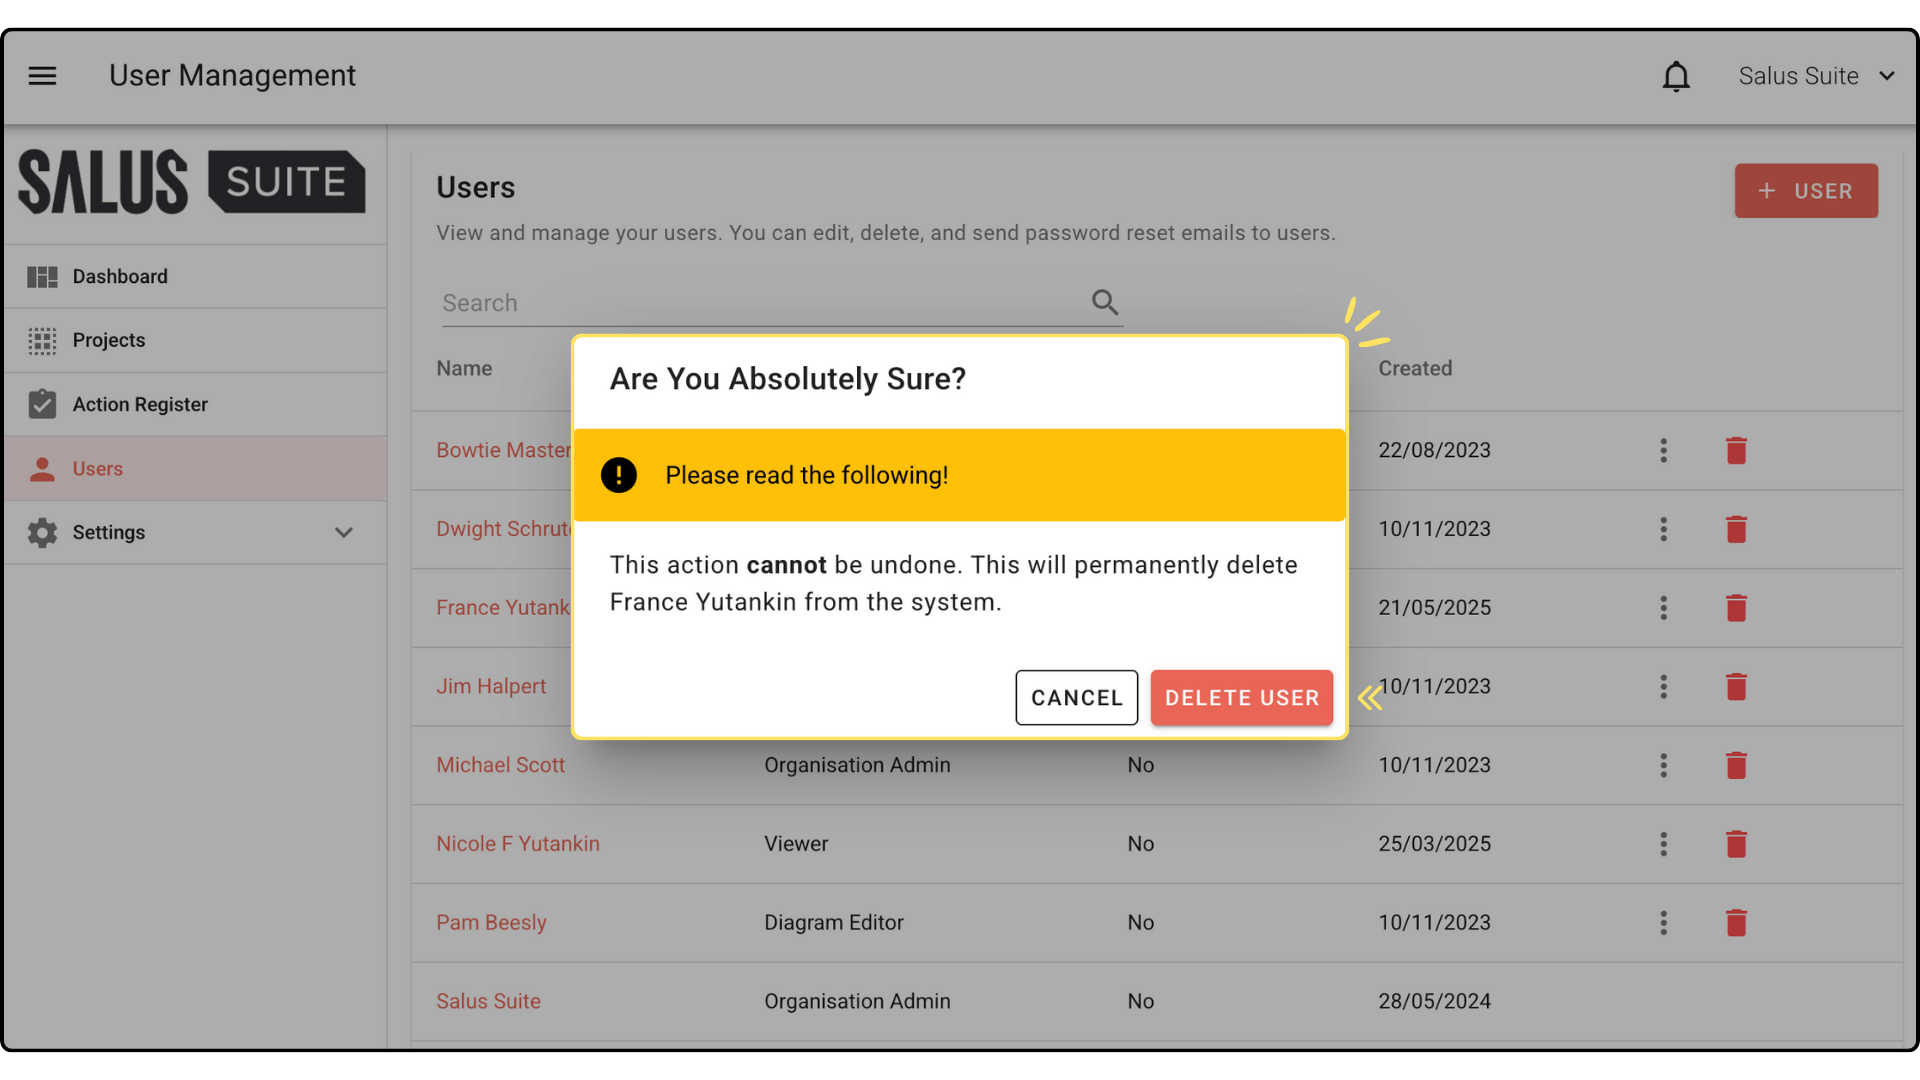
Change a user’s role
NOTE: Only Organisation Admins can access the Users Menu, and are therefore the only users who can complete this action.
Step 1: In the User Menu, click on the User you wish to edit.
Step 2: In the User Role dropdown, select the role you want. Click Save. 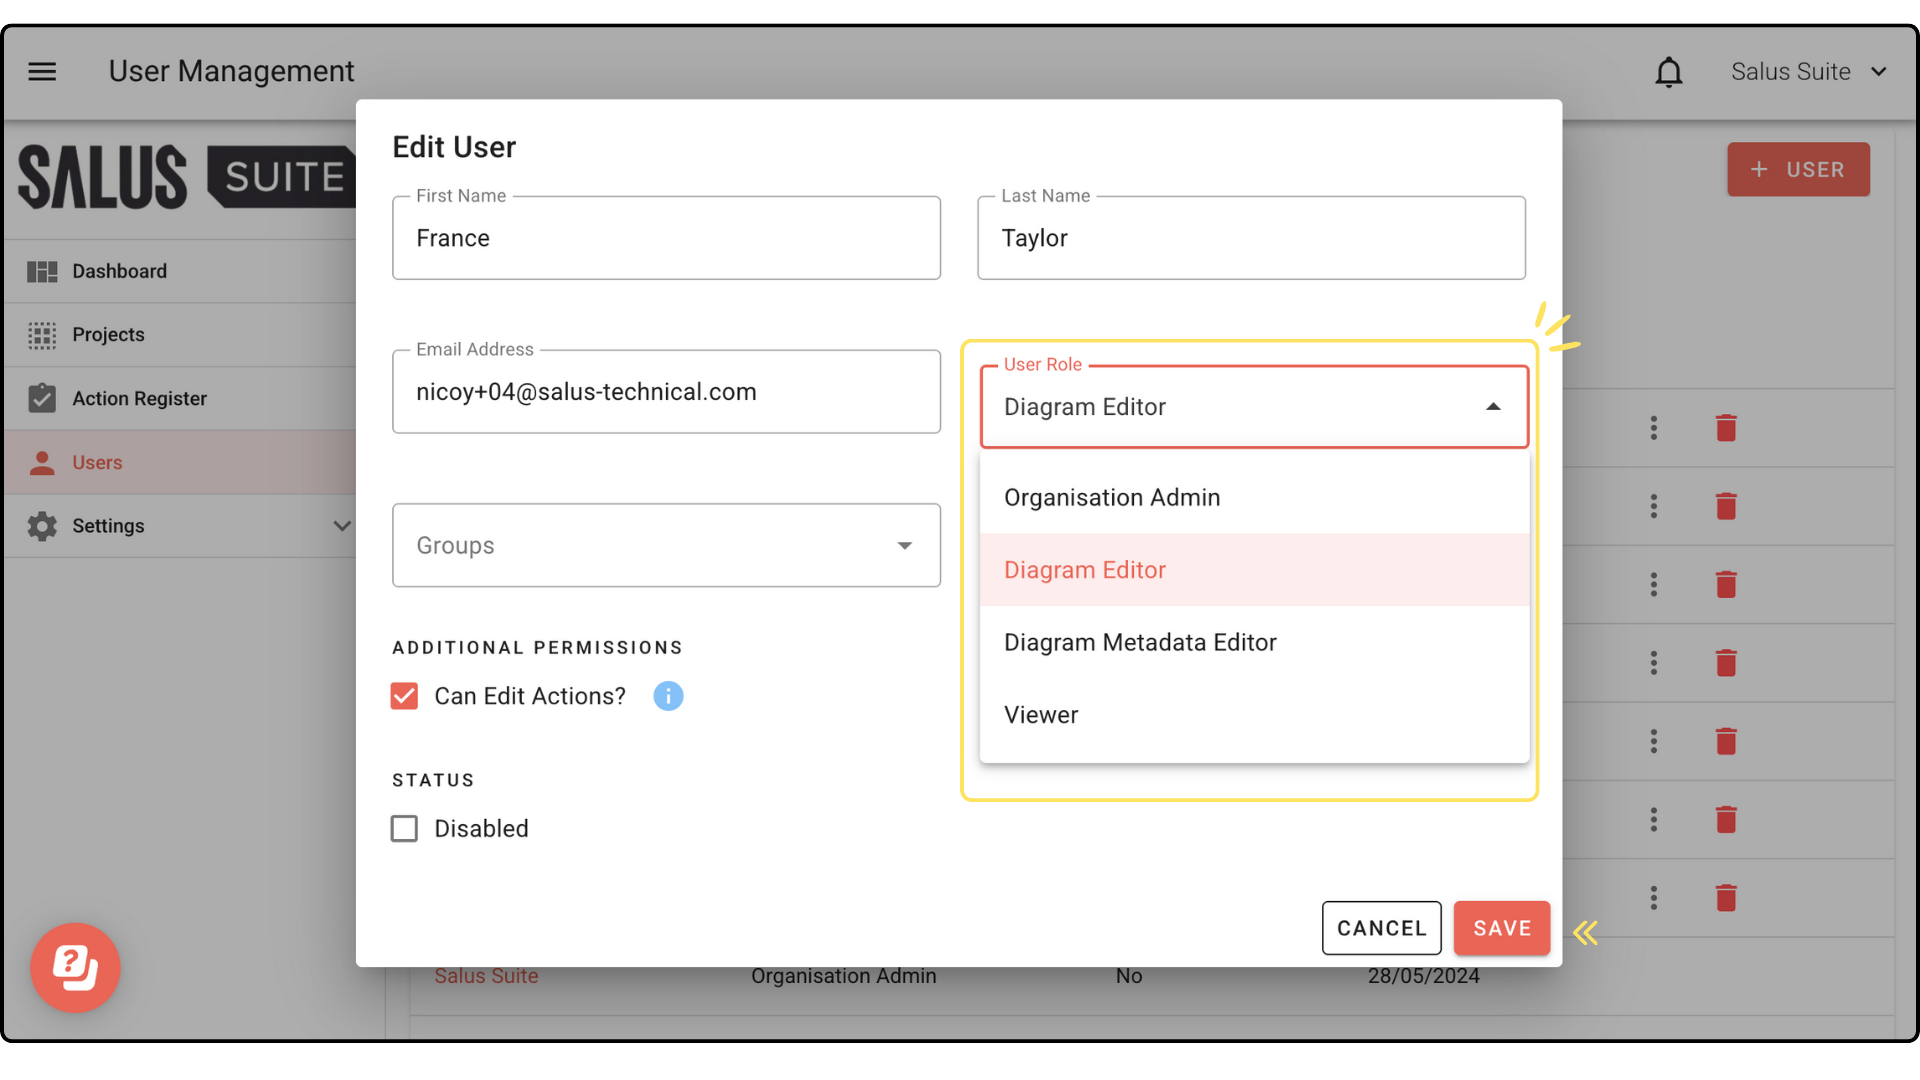
Disabling/Re-enabling a user
NOTE: We recommend disabling rather than deleting users who are likely to need access to the software in the future. Disabling removes software access, but keeps the user’s details in the system. This means a full set-up will not be required next time the user needs access, simply uncheck the Disabled tick box.
Step 1: In the User Menu, click on the User you wish to edit.
Step 2: In the Status, tick/untick the Disabled option. Click Save. 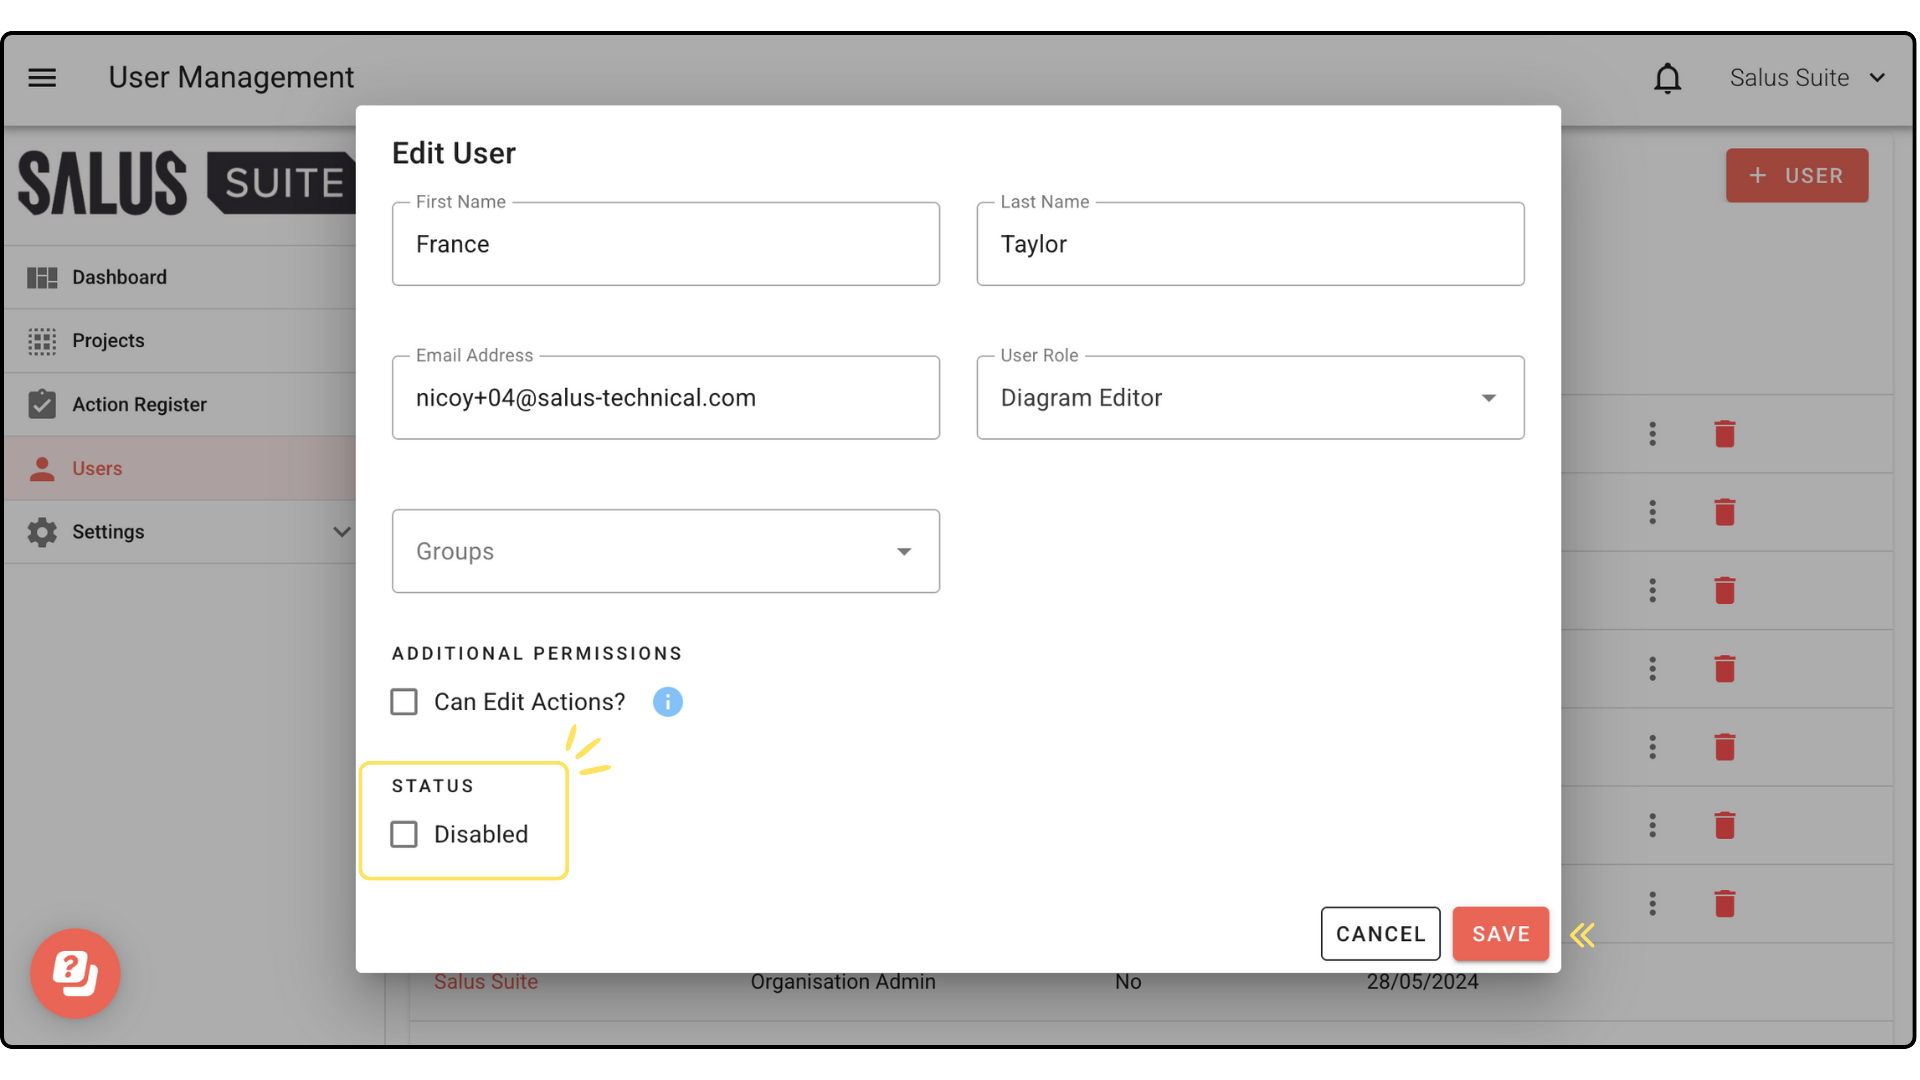
Adding a user to a group
NOTE: Only Organisation Admins can access the Users Menu, and are therefore the only users who can complete this action.
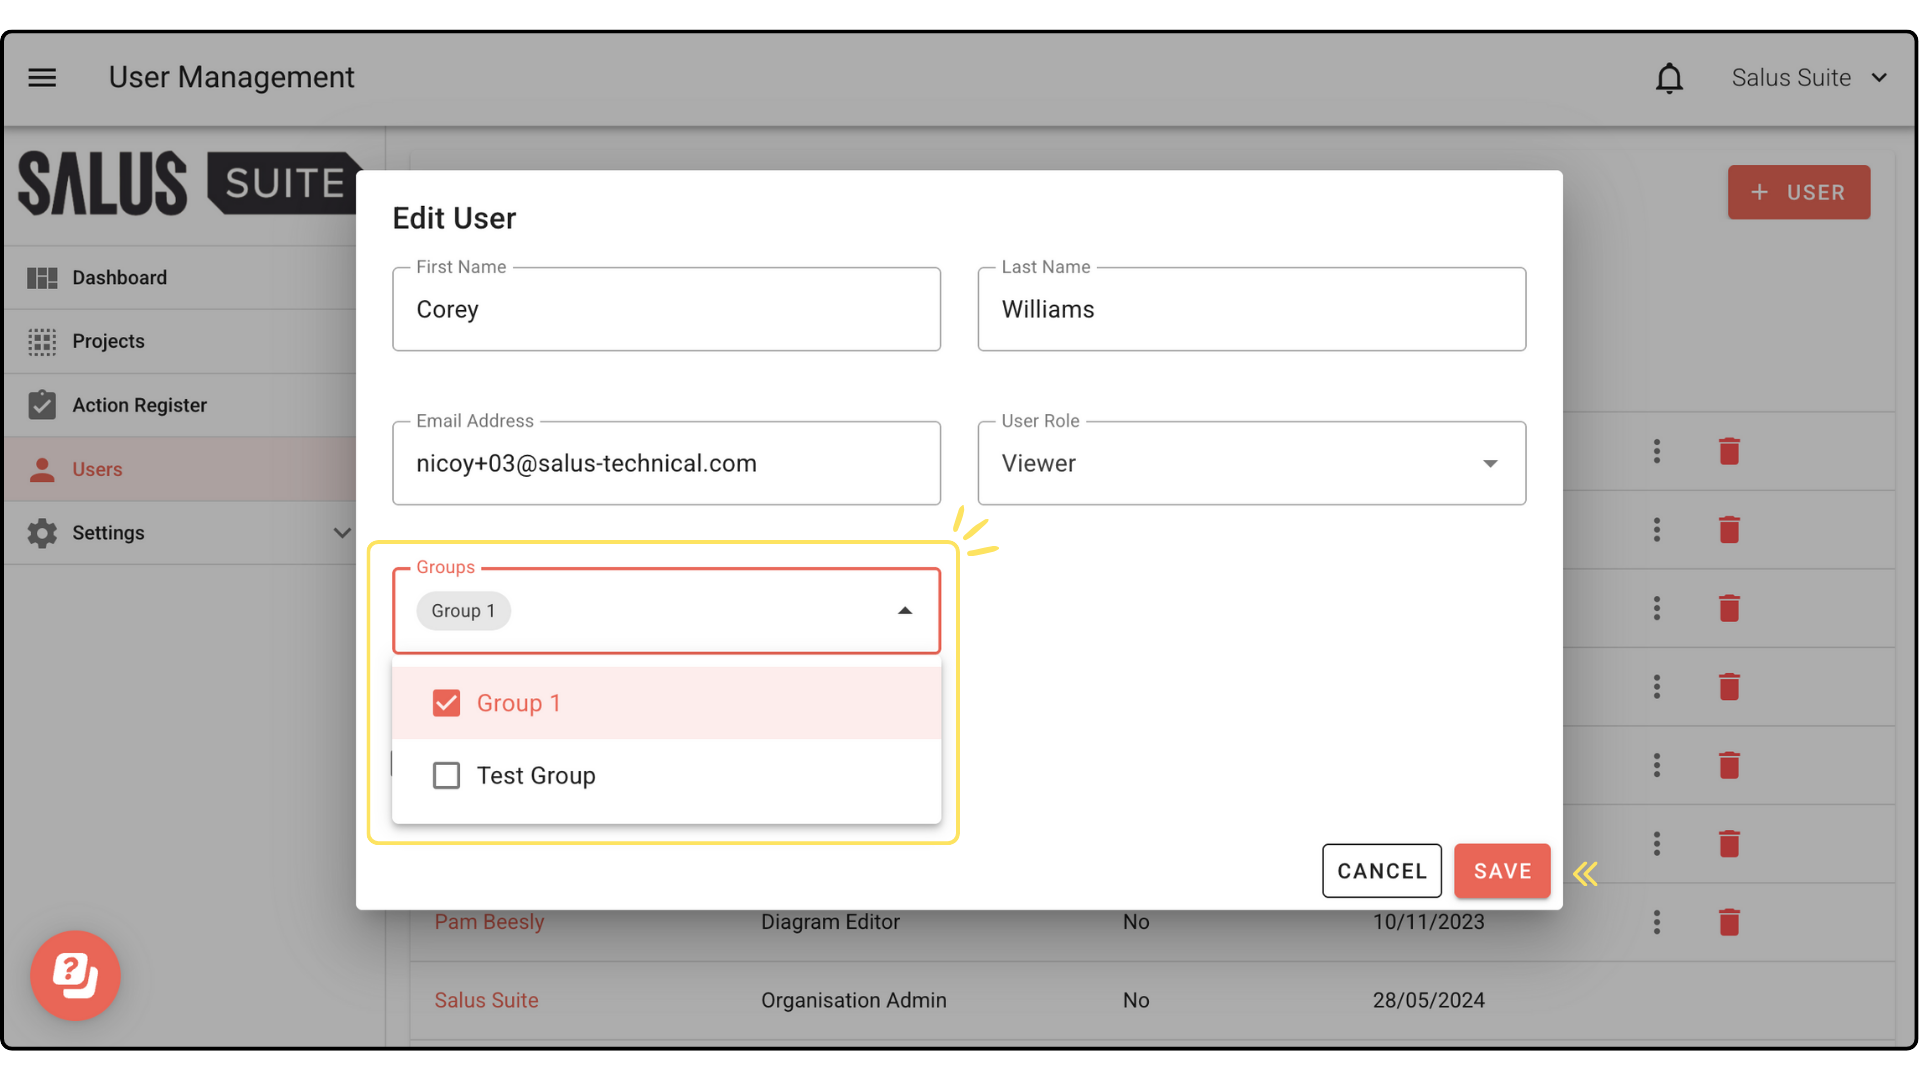
Step 1: In the User Menu, click on the User you wish to edit.
Step 2: In the Groups dropdown, select the group/s you want the user to belong to. Click Save.